• A few days ago, Tiffany from Eat at Home posted a recipe for cranberry orange oatmeal cooked in the slow cooker.  I’ve attempted to make oatmeal in the slow cooker, and it did not turn out pretty.  Most of it was wasted.

    This recipe turned out great because I found a different way to cook the oatmeal in the slow cooker that did not burn or dry out the oatmeal.  The result was creamy oatmeal, so I did not have to add any liquid to it when I heated it up the next day!!!!!!  :)

    Cranberry Orange Oatmeal

    adapted from Eat at Home  and the Motherload

    IMG_0923[1]

    Stars of the recipe:

    • 1/2 c, steel-cut oats
    • 1 c. orange juice
    • 1 c. water
    • 1/4 c. sugar (I omitted this.)
    • 1/2 tsp. vanilla
    • 1/4 c, dried cranberries

    Steps:

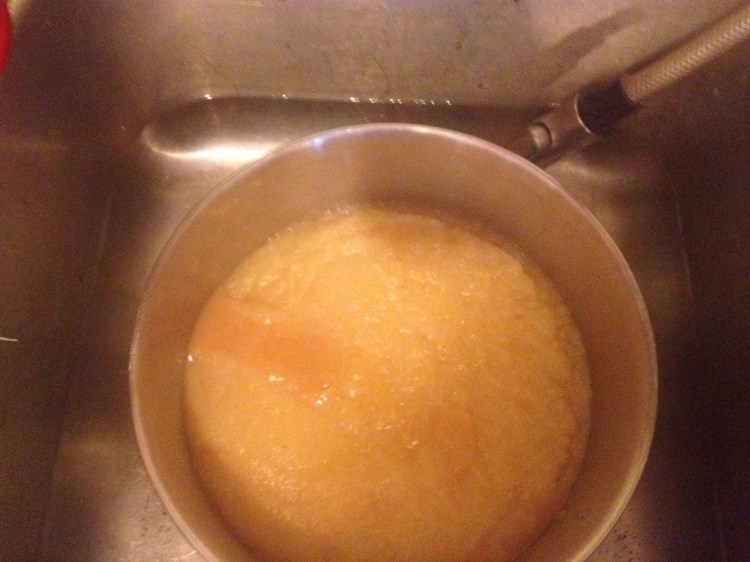
    1. Find a bowl that is big enough to hold the oatmeal but small enough to fit in the slow cooker.  It also needs to be oven safe.
    2. Spray the bowl with cooking spray and add the ingredients.
    3. Stir!
    4. Place the bowl in the slow cooker.
    5. Pour water around a bowl to create a water bath (an inch high).  Place the lid on the slow cooker.
    6. Turn the slow cooker on low and cook for 6 to 8 hours.
    7. Enjoy!

    BTW:  I used a 6-quart slow cooker.

    Printable Recipe


  • This week’s a strange week.  I’ve only got to cook dinner 3 times this week – Monday, Tuesday, and Thursday.  So my method for planning those 3 days is this:  Go to my freezer.  Open it up.  What do I have that I need to eat up or cook up.  So it’s no real plan for this week.  

    Monday – Hoison chicken with rice and veggie

    Tuesday – Open up the freezer and find something to cook or eat up

    Wednesday – ZooClues at the Columbus Zoo – Buffet style dinner – Hubby and I; boys are spending the night at the grandparents, so they have a rare treat – Kids’ Cuisines for dinner

    Thursday – Open up the freezer and find something to cook or eat up

    Friday – Chick Fil A (profits are going towards a mission of our youth group)

    Saturday – Hubby is eating at a bonfire, and the boys and I are going to be at the Zoo for Boo at the Zoo

  • My husband loves getting food from Chinese restaurants in our local mall’s food court. So I decided to recreate one of the dishes he might purchase there. This dish was healthier than what you get at the food court.

    He thought it was a sweet and sour dish when it was cooking in the oven. So he was super excited about dinner last night.

    The only issue with the dinner was super lemony, but it’s an easy fix. If you love a lemon flavor, add lemon zest and juice.

    IMG_4361
    Lemon Chicken
    IMG_4362
    Lemon Chicken

    Lemon Chicken

    Stars of the recipe:

    • 1 lb. thinly cut chicken breast, chicken breasts pounded thinly, or chicken thighs pounded thin (If you are going to pound out the chicken, place wax paper on a cutting board and then the chicken.  Place another piece of wax paper on top of the chicken. Using a heavy skillet, pound the chicken until it’s about a 1/2 inch thick. Hint:  An inch is from the tip of your thumb to the knuckle. So a 1/2 inch would be to the end of your thumbnail.)
    • 1/4 c lemon juice
    • 1/4 to 1/2 c, bread crumbs or panko
    • Optional:  1 Tbsp. lemon zest and additional lemon juice
    • 8 x 8 square dish sprayed with cooking spray

    Steps:

    1. Preheat oven to 350 degrees.
    2. In a bowl big enough to dredge the chicken in, place the lemon juice. In another bowl big enough to dredge the chicken in, place the bread crumbs or panko.
    3. First, dredge the chicken in lemon juice and then dredge the chicken in the bread crumbs or panko.
    4. Place in the cooking dish.
    5. Continue with the remainder of the chicken pieces. If you want it lemony, top it with more lemon juice and zest.
    6. Bake in the oven for 20 to 30 minutes.
    7. Enjoy with rice!

    Printable Recipe

  • Breakfast

    Lunch:

    For a snack on my way home, I’ll either have

    20131015-063005.jpg
    Or

    20131015-063027.jpg
    That is I’ll eat it if I’m hungry.

    I also have either a small handful of almonds or chocolate covered raisins between groups of students.

  • IMG_4357
    With chocolate cats ready to be dunked
    IMG_4352
    With chocolate cats ready to be dunked
    IMG_4355
    With chocolate cats ready to be dunked

    I love chocolate chip cookies.  Actually, I like most cookies.  You might say cookies are my weakness!  I mean dessert weakness.  This dip reminds me of a chocolate chip cookie. Best of all, you don’t have to bake cookies to get deliciousness.  :)

    Now the question is, what should I dip into this yumminess!  I’ve been dipping chocolate cat cookies from Trader Joe’s.  Tomorrow I’m going to try dipping my sliced apples in the dip.  That sounds absolutely divine.

    Side note:  Have you ever had someone obsessed with your food choices.  I eat in my classroom and have limited time to eat.  Today I was running late getting to eat because I had to print some papers and then talk to two other teachers.  I was finishing my lunch when my four students came for social studies.  They were intrigued by what I was eating.  They would have been shocked to find out what was in the dip.  (My students have seen my lunches many times.  Fortunately, most of the time, it’s something fairly healthy.  This way, I can be a good role model for them.  One is concerned that I don’t eat a lot of meat.  I eat meat, but it depends on my mood whether I eat a lot of meat or not.)

    Chocolate Chip Cookie Dough Dip

    adapted from Chocolate Covered Katie

    Stars of the recipe:

    • 1-1/2 c. chickpeas or white beans (1 ca
      n
      , drained and rinsed very well)
    • 1/8 tsp. salt
    • 1/8 tsp. baking soda
    • 2 tsp. pure vanilla extract
    • 1/4 c. nut butter of choice – I used almond butter.
    • up to 1/4 c. of milk
    • 2/3 c. brown sugar
    • 1/3 c. chocolate chips
    • 2 to 3 tsp. oats

    Steps:

    1. Add the ingredients except for chocolate chips and milk to a good food processor.
    2. Blend the ingredients – streaming into milk until desired considency.
    3. Remove from food processor cup.  Mix in chocolate chips.
    4. Put in the fridge overnight.
    5. Enjoy with apples, graham crackers, or just eat by the spoonful!

    Printable Recipe

    Happy Eating,
    Traci

  • Mmm!  Comfort food makes you feel good inside.  Pot roast is one of those foods.  As I was coming up with this week’s menu, I decided pot roast should be one of our dinners.  The interesting thing was we had a pot roast for our dinner at my in-law’s last night.  The difference was how we prepared the roast.  The side dishes were different also.

    I’ve made this recipe for over 10 years.  It is super easy and delicious.  After we have a roast for dinner, another night during the week, I make a hash (minus eggs) with the leftover roast.  Yum!

    Even though I like making baked potatoes cooked in the slow cooker, I’m not a fan of potatoes cooked with roast.  We had buttered noodles with our roast.

    Easy Slow Cooker Pot Roast

    Stars of the recipe:

    • roast (size depends on the needs of your family)
    • 30 oz. can of tomato sauce
    • optional:  russet potatoes peeled and cut into chunks, onions cut into chunks, carrots peeled and cut into strips

    Steps:

    1. Place roast into the bottom of the slow cooker.
    2. If placing vegetables, place them on top of the roast.
    3. Pour tomato sauce over the roast.
    4. Cook for 3 to 5 hours on high or 6 to 8 hours on low.
    5. Enjoy!

    Printable Recipe

  • Here are my plans for dinner:

    Monday – pot roast, butter noodles, and veggies

    Tuesday – lemon chicken (if the recipe works, I’ll post it here) with rice

    Wednesday – homemade taco hamburger helper (if the recipe is good, I’ll post it here)

    Thursday – pot roast hash

    Friday – pretzel chicken tenders, mac, and cheese, veggies

    Saturday  – Harvest bean soup

  • So my family has decided we are going to Walt Disney World at the beginning of April.  Yesterday we hunted for the pictures we took during our last trip to Disney in 2009 when the boys were 3 and 5.  We finally located the majority of the pictures.  There was 1 picture I really wanted to find because it is hilarious.  I was taking a picture of the German Pavilion in Epcot.  When I looked at the picture later, there was a teenager in the middle of the picture, and his expression was like, “Just take my picture already.”  It looks like I was taking a picture of him instead of the German pavilion.  

    Here’s the picture:

    100_1248
  • This month we followed a different format.  Instead of being paired up with two people (one who bought and sent to me and the other I bought for and then sent the box), we were paired with one other person.  We bought and sent to each other.  

    This month, I was paired with Jessica who lives in Mississippi.  She had never been to Ohio and I have never been to Mississippi.  I sent her a box of my usual goodies,  One of which is the Triple Treat Granola.  All 3 times that I’ve sent that granola, the recipient loved it.  

    Okay onto what Jessica sent me:

    Thank you Jessica for the great box!

  • I’m so proud of myself.  Today we were given a chance to go apple picking at one of our fellow church member’s houses.  We could take as much as we wanted, which is totally cool.  The Imaginative One is a fussy eater but loves his apples and applesauce.  So I jumped at the chance.

    We picked a lot of apples and made memories with the boys.  The Imaginative One was stung by a bee but was happy because the apples were absolutely delicious.  That made up for his finger being stung.

    Once we got home, I washed some of the less attractive ones.  Then I peeled and cut them into smaller pieces.  I placed it into one of my bigger pots, covered the apples with water, and cooked them for half an hour.  The boys helped me puree the apples in the blender for a smoother applesauce.  The end result was a delicious applesauce.

    So why am I proud of myself.  I made homemade applesauce that I knew the boys would eat.  I made memories with the boys.  We picked the apples, and within 2.5 hours, I had applesauce.  That is why I’m proud of myself.

    Homemade Applesauce

    IMG_0576[1]

    Stars of the recipe:

    • 3 to 4 pounds of apples, peeled and quartered (or cut smaller)
    • cinnamon to taste or cinnamon sticks
    • water
    • sugar to taste (1/4 to 3/4 c.)

    Steps:

    1. Wash, peel, and cut apples.
    2. Place in a big pot and then cover with water.  Sprinkle with cinnamon or put in the cinnamon sticks.
    3. Put the pot on the stove and turn the heat on to high.
    4. Allow the water to boil, and then turn it to medium-low.
    5. Cook until the apples are tender.
    6. Either use a food mill or a blender to puree the apples.  (We used the blender.  When we did, we used the apples and some of the cooking water.)
    7. Place in a bowl.  Sprinkle with more cinnamon and sugar to taste.
    8. Enjoy warm or cooled down.

    Printable Recipe