• This has been an odd week for me, cooking-wise.

    • Sunday – I cooked a great dinner for Hubby’s birthday.
    • Monday – I had training after work, so I grabbed food on the way home.  I was STARVED.   The rest of the family ate leftovers.
    • Tuesday – We had a Boy Scout potluck dinner.  Hubby was on his own while we ate at the potluck.  I warmed up a tray of mac and cheese for the potluck.
    • Wednesday – Hubby made ravioli for the family.  I did bake cookies.  I used the make-ahead chocolate chip mix for the cookies.
    • Thursday – I had to stay after work for a meeting.  Since we had a busy night, I stopped and got dinner on the way home.
    • Friday – For a third time, I had to stay after work for another meeting.  The Imaginative One had to be dropped off for a weekend camp, so Hubby took care of feeding them.  I ordered Chinese for myself because I had some online training to complete last night.

    Here are some recipes I posted this past week:

    I plan to use the crock pot for our dinner next week, so my family can have home-cooked meals instead of just eating whatever.  I’ll post my menu on Monday.  :)

    I have two more recipes I want to post bu,t I haven’t had a chance.

    On my other blog, I posted pictures of the boys playing with bubbles, blessings, and a summer recap of the Crohn’s Conservatory and Harriet Beecher Stowe’s House.

    Happy Eating,
    Traci

  • When we eat pasta dishes at our house, the three of us enjoy eating garlic bread with our dinner.  The Wee One refuses to eat garlic bread.  That means extra garlic bread for the rest of us.

    The other day I decided to make garlic bread using hoagie buns from Sam’s Club.  The result was pure deliciousness.  Hubby really loved it.

    This recipe was easy to put together and get onto the table.  Use leftover rolls, Italian bread, or French baguette to make the bread.

    Easy Peasy Cheesy Garlic Bread

    IMG_0097

    Stars of recipe:

    • Leftover rolls, French baguette, or Italian bread (You can even use hot dog buns.)
    • 1/2 to 1 Tbsp. Of butter, melted per bread (More if a bigger piece of bread, less if a smaller piece of bread – It also depends on your preference.)
    • 1/2 to 1 Tbsp. of granulated garlic
    • 1/4 c. Italian blend shredded cheese

    Steps:

    1. If using left-over buns, open them up.  If using bread, cut it into smaller pieces.  Place on a cookie sheet.
    2. Melt the butter in the microwave (mine took a minute).
    3. Spread butter on buns or bread.
    4. Sprinkle garlic over the butter.
    5. Sprinkle shredded cheese over the garlic.
    6. Place in oven and broil for 3 minutes or so.  Watch the bread, so it doesn’t burn.
    7. Enjoy!
  • Sometimes I crave the classic combo of grilled cheese and tomato soup.  I really don’t like condensed tomato soup unless I doctor it up with basil.  So when I craved it, I decided to try making a homemade version of the soup.  It ended up being yummy!

    This recipe came from Rachael Ray.  As a novice cook, I watched her 30-minute meals A LOT.  Hubby credits her with teaching me to cook.  We had some really interesting meals during our first few years of marriage.  Dry hamburger patties were the norm.  Hubby got us cable, so I would watch the Food Network.  Slowly the meals I was cooking became better.

    When the Imaginative One was younger, he loved watching Rachael Ray with me.  She was his first celebrity crush.  In 2008, right before my grandma died, he and I met her when she came to a local bookstore.  (I can’t find the picture.)  She also signed a cookbook for him.

    Creamy Tomato Soup

    Adapted from Rachael Ray

    (2 to 4 servings depending on how much soup you eat.)

    Stars of the recipe:

    • 1 – 15 oz. can think of chicken broth
    • 1 – 14 oz. can of CRUSHED tomatoes
    • 1 c. heavy cream
    • salt and pepper to taste
    • 1 Tbsp. dried basil
    • 1 bay leaf

    Steps:

    1. Combine chicken broth and crushed tomatoes in a heavy bottom soup pot.
    2. Heat to boiling.
    3. Turn it down to low.
    4. Add cream, basil, bay leaf, salt, and pepper.
    5. Simmer for 15 minutes on low.
    6. Remove the bay leaf with a spoon.
    7. Take off the heat and ladle into bowls.
    8. Enjoy!

    This post has been linked to the following:
    Treasure Box Tuesday

  • Until a few years ago, breakfast was not a favorite meal of mine.  I rarely ate breakfast which is not a good habit to get into.  Then I made a resolution in 2013 to eat breakfast every day.  I did 98% of the time, but a few times, I forgot to – usually if I was sick.  I’ve been getting into the habit of not eating breakfast some mornings or grabbing breakfast at school.  Those breakfasts are not the healthiest, so I need to rethink breakfast once again.

    In August 2013, I wrote a blog post about 6 Easy Breakfast Foods.  One of the foods I mentioned is oatmeal.  Oatmeal can be eaten hot or cold.  It can be savory or sweet.  I have not eaten savory oatmeal,, though.  I took oatmeal packets with me to Walt Disney World when we went during my Spring Break in 2014 with a hot water kettle.  Mornings were oatmeal and coffee and then running around the parks.

    Lately, I have been craving oatmeal for breakfast. I tried to make some overnight oats for breakfast on Friday. However,, it was very runny. So I did not eat it since it was unappetizing.

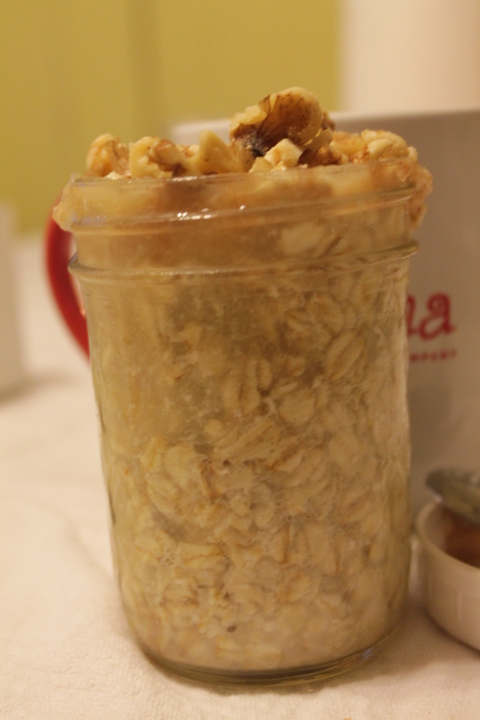
    I tried to make a different overnight oatmeal Friday night. It ended up being much better than Friday’s oatmeal. It tastes just like fall. Yum!

    A year ago, I had made this recipe while the boys and I were on a road trip, so I knew it was good. However,, I stopped eating oatmeal for a while.  Actually, I continued to eat oatmeal but in the form of granola.

    So why is overnight oatmeal a great choice for breakfast?

    1. It can be made up the night before.
    2. You don’t need to cook anything.  Just place it in the container and go, so it’s great for when you are on road trips.
    3. You can dress it up almost any way you like.

    Some overnight oatmeal recipes call for yogurt, while others don’t.  This one is one that does not call for yogurt.  Instead, I use applesauce as the binder.  You can either use homemade applesauce or store-bought.  It’s totally up to you.  If you are using unsweetened applesauce, feel free to sweeten the oatmeal with some honey.  If you want to add some protein, add some nuts.  I think walnuts are a great type of nut for this overnight oatmeal.

    Onto the recipe:

    Applesauce Overnight Oatmeal

    Adapted from Cheap Recipe Blog 

    Stars of the recipe:

    • 1/2 c. rolled oats (don’t use quick oats or steel-cut oats)
    • 1/2 c. milk of choice (cow, almond, coconut – I used almond.  It tasted wonderful.)
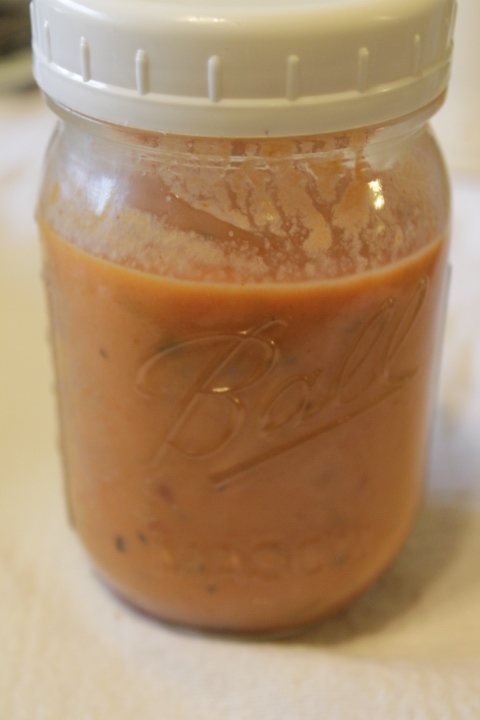
    • 1/2 c. applesauce – (homemade or store-bought)
    • 2 tsp. cinnamon or apple pie spice
    • 1/2 to 1 Tbsp. honey or sweetener of choice – optional
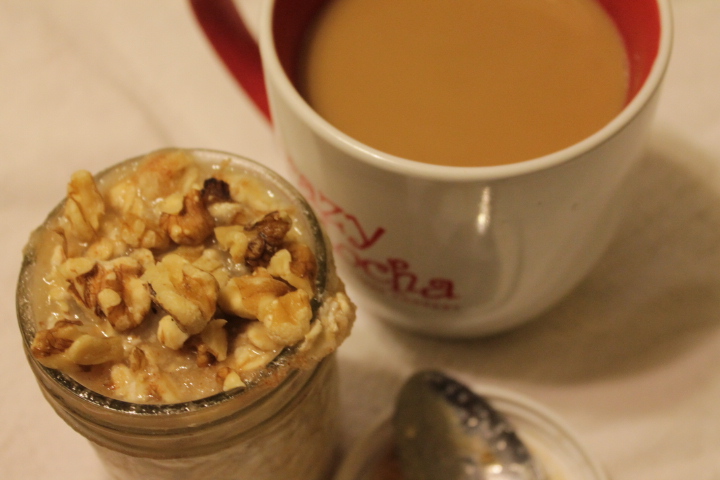
    • 1/4 c. chopped nuts – optional (I used walnuts.)

    Steps:

    1. In a jar or mason jar, place the oats, milk, applesauce, cinnamon, and sweetener.
    2. Put the lid on and shake it up.
    3. Place in the fridge overnight or for at least 3 hours.
    4. When you are ready to eat it, take it out of the fridge.  Allow sitting on the counter for 10 minutes to take the chill off.
    5. Add the nuts if using.
    6. Enjoy your breakfast!

    Happy Eating,
    Traci

  • This blog has been around for five years (June 2010).  However, I stopped writing about it in Feb. 2014.  I tried to pick it up on the blogger platform until August 2014 but stopped.

    Now I’ve decided to restart the blog.  I need ideas of what topics to write about.  If you could please comment on this post or on my Facebook page.

    That’s the other things I wanted to talk about.  I created a Facebook page for this blog back in 2010.  I don’t do much with it because I only have 64 likes on the page.  I really would like to have more likes on it.  It’s named Ramblings of my Crazy Life after my second blog.  Here is a link to it.  Please go and visit it and post what you would like me to blog about, either cooking or life-wise.  If it’s done with cooking or feeding my family, I’m putting it on this blog.  I’ll post it on the other blog if it’s about life.

    I also have a Pinterest account for this blog.  Since I haven’t used this blog lately, I haven’t put anything new on it.  I’m not a big Pinterest user, so I don’t go on there often.

    My ultimate goal for this blog is to be like a recipe book for my boys when they are young men and start off life cooking for themselves.

    I cannot believe that they were only 5 and almost 7 years old when I started this blog.  They are now 10 and 12 years old.  They still will ask me, “What’s for dinner?” when I come home from work.

    Here are some pictures of some foods I cooked or whipped up this week:

    Applesauce Overnight Oats

    Easy Peasy Garlic Bread

    Copycat Frosty

    Have a great week.  Oh, and the link to my Facebook page is on the sidebar.  Please go over and check it out.

    Happy cooking,

    Traci

  • Since Hubby needs to be out the door soon after I get home, quick meals are important.

    Hamburgers are one meal that can be put on the table quickly. Cook up some fries with it or serve some potato chips with the hamburgers. Add some raw veggies, and you have a complete meal.

    Hint about the hamburgers – Shape the patty and then put an indentation in the middle. This will allow the patty to retain its shape as it cooks.

    IMG_0058
    IMG_0057

    Hamburger Patties

    IMG_0061
    IMG_0059

    Stars of the Recipe:

    • 1 to 2 lbs of ground beef (80% or 85%) – The more fat the juicer will be
    • 1 to 2 Tbsp. Worcestershire sauce
    •  2 Tbsp. dried minced onion or grated fresh onion
    • 1 to 2 Tbsp. of your favorite seasoning

    Steps:

    1. Heat up a skillet to med. High heat or preheat your indoor grill.
    2. In a large mixing bowl, add the meat, Worcestershire sauce, onion, and seasoning.
    3. Mix together but don’t over-mix.
    4. Form into patties, and make sure to make an indentation in the middle. (My patties are the size of my hand cupped. )
    5. Cooked until cooked through. If on the griddle, turn it after about 3 to 5 minutes. Allow cooking for 3 to 5 more minutes.
      Hamburger is cooked thoroughly when its internal temperature is 160 degrees.
    6. Enjoy either on a bun or without a bun. Top with your favorite toppings. We had thousand island sandwich spread and cheddar cheese on our burgers.
    IMG_0067
  • When I was in college back in the 1990’s, I worked at McDonald’s.  I usually worked at the front counter, front drive-thru, or back drive through.  Hubby knew I was someone special because I would take an order, take money, and be eating my dinner in the office next to the drive-thru all at the same time.  He couldn’t believe I could multi-task like that.

    One of the great benefits of working at McDonald’s was the free food.  As a poor college student, it was greatly appreciated.  I loved Big Macs and chicken nuggets with hot mustard sauce and sweet and sour sauce.  Yes, I know chicken nuggets from McDonald’s are not real chicken nuggets.

    The special sauce on the Big Mac’s was one of my favorite parts of the sandwich.  I’ve made a homemade version of the special sauce.  It’s absolutely delicious.

    Homemade Thousand Island Sandwich Spread

    Stars of the recipe:

    • 2 Tbsp. mayo
    • 2 Tbsp. ketchup
    • 1 Tbsp. pickle relish
    • 1 Tbsp. Worcestershire sauce (not pictured above)

    Steps:

    1. Place all ingredients in a small bowl.
    2. Mix together until well combined.
    3. Serve on your favorite hamburger or sandwich.
    4. Enjoy!

  • This is an easy meal to impress your guests with.

    On Sundays, we usually eat dinner with my mother-in-law.  It’s a tradition that started when Hubby and I were just married.  My father-in-law usually made the dinner.  When he died, we continued the tradition.  Sometimes I make the dinner.  Other times my mother-in-law makes the dinner.  Then there are times we eat out for Sunday dinner.

    This is one dinner that I made for our Sunday dinner.  It was easy to put together.  It’s important to make sure the pork chops are thin cut so they bake in the same amount of time as the veggies.  Serve bread on the side to make a whole meal.

    One Pan Pork Chop Dinner

    adapted from Eat at Home

    Stars of the recipe:

    • 4 to 6 thin cut pork chops
    • 1 lb. fingerling potatoes or red or yellow potatoes cut into either halves or quarters depending on their size
    • 3 – 4 c. cut veggies (I used broccoli and zucchini)
    • your favorite seasoning mix
    • salt
    • pepper
    • Extra Virgin Olive Oil

    Steps:

    1. Preheat oven to 425 degrees.
    2. Brush Extra Virgin Olive Oil on a big baking sheet.
    3. Toss the potatoes in a tablespoon of extra virgin olive oil and coat with salt and pepper.  Place on the cookie sheet
    4. Toss the veggies in a tablespoon of extra virgin olive oil and coat with salt and pepper.  Place on the cookie sheet next to the potatoes.
    5. Place the pork chops in the remaining space on the sheet or on another baking sheet.  Coat with your favorite seasoning.
    6. Bake at 425 for 25 to 30 minutes or until the pork chops are fully cooked (145 degrees Fahrenheit) and potatoes are tender.
    7. Enjoy with a salad and/or favorite bread.

    This post has been linked to:
    Treasure Box Tuesday

  • Disclaimer:  I don’t know Paul. He attended the same church my grandma did back in 1994, but that’s all I know.

    In 2007, my grandma fell and broke her leg. Since she had to go live in a nursing home, we had to clear out of her house. That was a somber and tedious task. I ended up inheriting some of her cookbooks. One was from the church she was a member of. I put the cookbooks on the bench. I also inherited it from her. When I finally did pull the cookbook out, I was pleasantly surprised. On some of the pages were notes about the contributors to the cookbook. It was so nice to see her handwriting once again.

    This summer, I again pursued the book and found this recipe for pancakes. I made them for Imaginative One’s 12th birthday. (When did he get so old??)  They loved the pancakes.

    Wee One ate 8 of the pancakes when I made the recipe again. I think he approved of the recipe. He also told me how good they were. Onto the delicious recipe:

    World Famous Pancakes

    20150820_172923

    Stars of the recipe:

    • 2 c. all purpose flour
    • 2 Tbsp. baking powder
    • 1/4 c. sugar
    • 2 lrg. eggs
    • 2 Tbsp. oil
    • 2 c. whole milk

    Steps:

    1. Heat up the griddle to 400 degrees or medium-high heat.
    2. Grease the griddle with vegetable oil or butter.
    3. Sift flour, baking powder, and sugar together in a large bowl.
    4. In another bowl, beat the eggs, oil, and milk until well blended.
    5. Add liquids to the dry ingredients. Mix until creamy with little lumps.
    6. Ladle the batter onto the griddle using a ladle or 1/4 c. measuring cup.
    7. Cook until bubbles form and edges look dry.
    8. Flip and cook for a minute more.
    9. Enjoy!!!!

    This post has been linked to the following:
    Treasure Box Tuesday

  • IMG_1404

    We love chocolate chip cookies around here.  However, I’m not always in the mood to mix up a full batch of cookies.  Make ahead chocolate chip cookie mix to the rescue.  The dry ingredients are already mixed up, so all you need to do is add the wet ingredients and mix.

    IMG_1397

    Hint:  Use an electric mixer because it’s harder to mix by hand.  It’s doable. Just harder to get all the ingredients mixed together.

    IMG_1396

    These can be stored for 3 months in an airtight container.  I used zippered storage bags.

    Make Ahead Chocolate Chip Cookie Mix

    Adapted from Lauren’s Latest

    IMG_1401

    Stars of the recipe:

    • 1 1/2 c. all-purpose flour
    • 1/2 c. brown sugar
    • 1/2 c. granulated sugar
    • 1/2 tsp. baking soda
    • 1/4 tsp. baking powder
    • 1/4 tsp. salt
    • 1 c. chocolate chips

    Steps:

    1. Mix all of the ingredients together in an airtight container.
    2. Store for up to 3 months.

    Chocolate Chip Cookies using the Make Ahead Mix

    IMG_1395
    IMG_1393
    IMG_1400

    Stars of the recipe:

    • Make Ahead Mix
    • 1 stick softened butter (1/2 c.)
    • 1 Tbsp. vanilla
    • 1 Tbsp. milk
    • 1 egg

    Steps:

    1. Preheat oven to 375 degrees.
    2. Place all of the ingredients in a mixing bowl.
    3. Mix together until well incorporated.
    4. Drop cookie dough by tablespoons onto a baking sheet.
    5. Bake for 8 to 9 minutes.
    6. Allow cooling for at least 2 minutes before removing it from the tray.
    7. Enjoy with a glass of milk, a cup of tea, or a cup of coffee.

    I got at least 36 out of my dough, but the original recipe got 18 out of her mix.